Trips Settings
Use Trips Settings during onboarding to decide how travel requests should work in your workspace. This is where administrators set the normal approval behavior, required travel information, cost tracking, and extra fields.
Think of Trips Settings as the travel policy for Compass. It gives everyone the same starting rules, while approval rules and user overrides handle special cases.
You only see Trips -> Settings if your role has access to Trips module settings.
Set The Workspace Defaults For Trips
The Trip Settings card controls the workspace-wide defaults for all new trips. These are the normal rules Compass uses unless a more specific approval rule or user override applies.
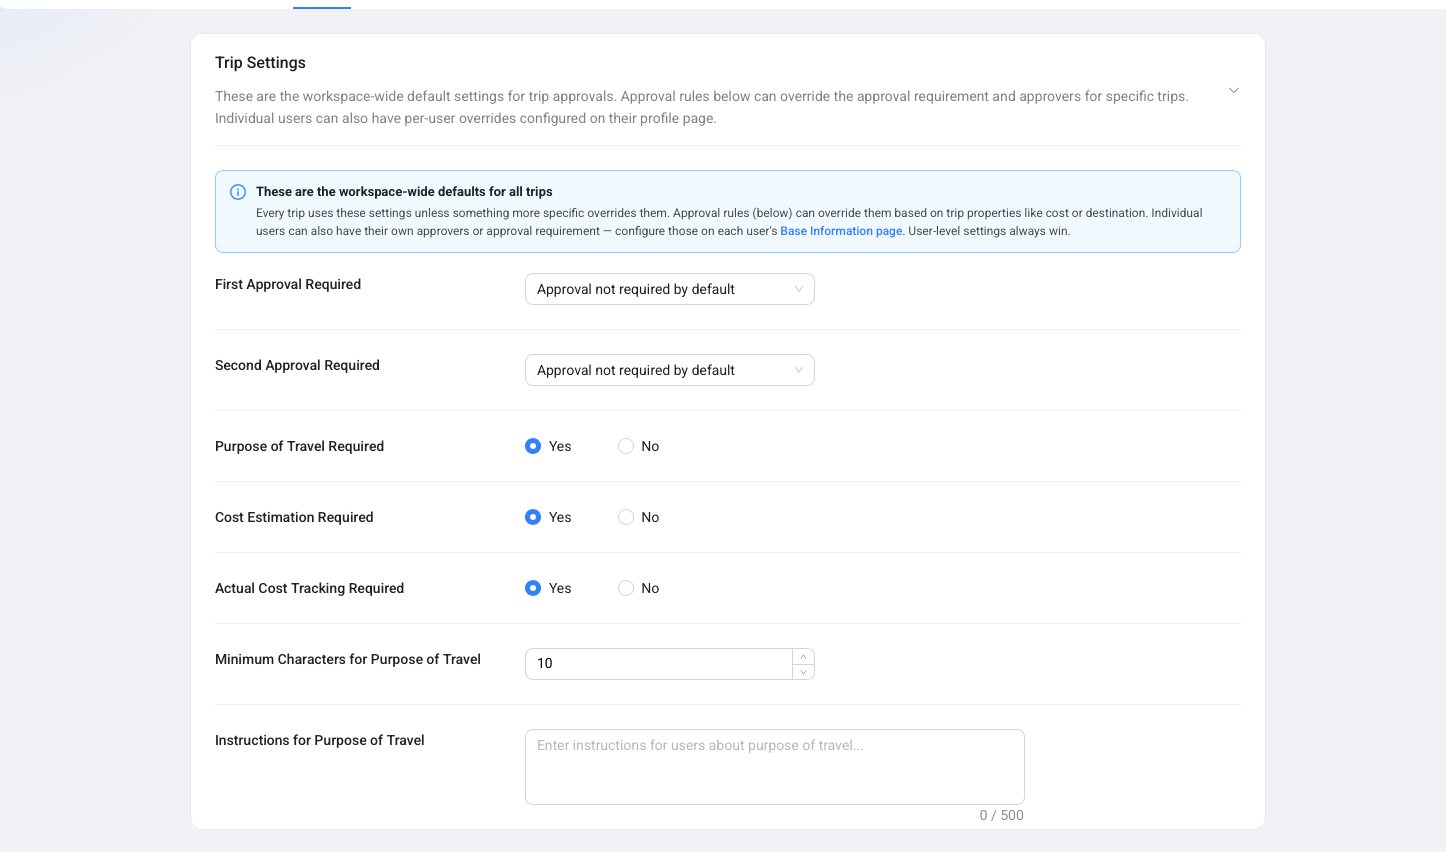
Use First Approval Required and Second Approval Required to decide whether one or two approval layers are normally needed. For each layer, you can choose whether approval is required by default or not required by default.
Use Purpose of Travel Required when travelers must explain why the trip is needed. You can also set a minimum character count and add instructions, so staff know what kind of purpose text is expected.
Use Cost Estimation Required when travelers must enter estimated transportation cost and estimated stay cost before submitting a trip. Use Actual Cost Tracking Required when the real cost must be entered after the trip is finished.
Turn on actual cost tracking when travel expenses are billed later or used for project finance reporting. Estimated costs help with planning, while actual costs show what was really spent.
Use Approval Rules For Exceptions
Approval rules let you change the default approval behavior for trips that match specific conditions. Use them when the workspace default is correct most of the time, but not for every trip.
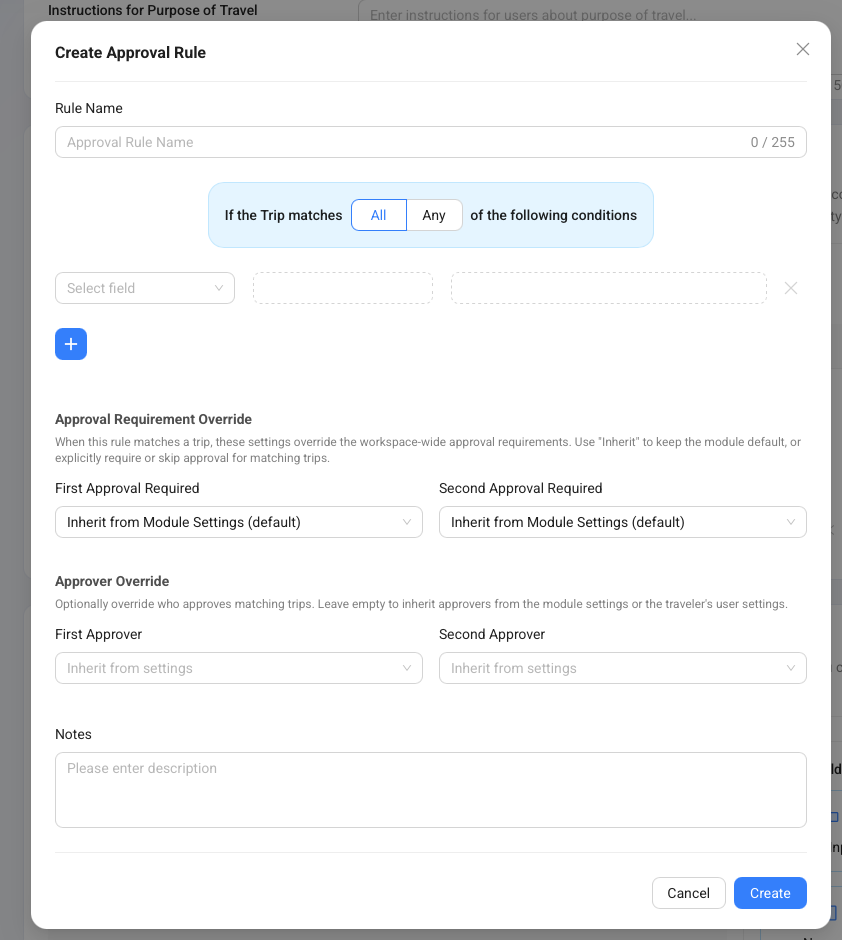
For example, your default can say approval is not required. Then you can create a rule that requires approval for business travel above 2,000 EUR, for specific travelers, or for trips in a specific category.
In the rule modal, choose whether the trip must match All conditions or Any condition. All means every condition must be true. Any means one matching condition is enough.
Under Approval Requirement Override, choose whether the first approval and second approval should inherit the module setting, require approval, or skip approval for matching trips. Under Approver Override, you can choose specific approvers for matching trips. Leave approvers empty when the trip should use the normal approvers from module or user settings.
Add Custom Fields To Trip Requests
Custom fields let your workspace collect extra trip information that is not part of the standard trip form. Add them when your team needs a special reference, checklist answer, file, date, or dropdown value.
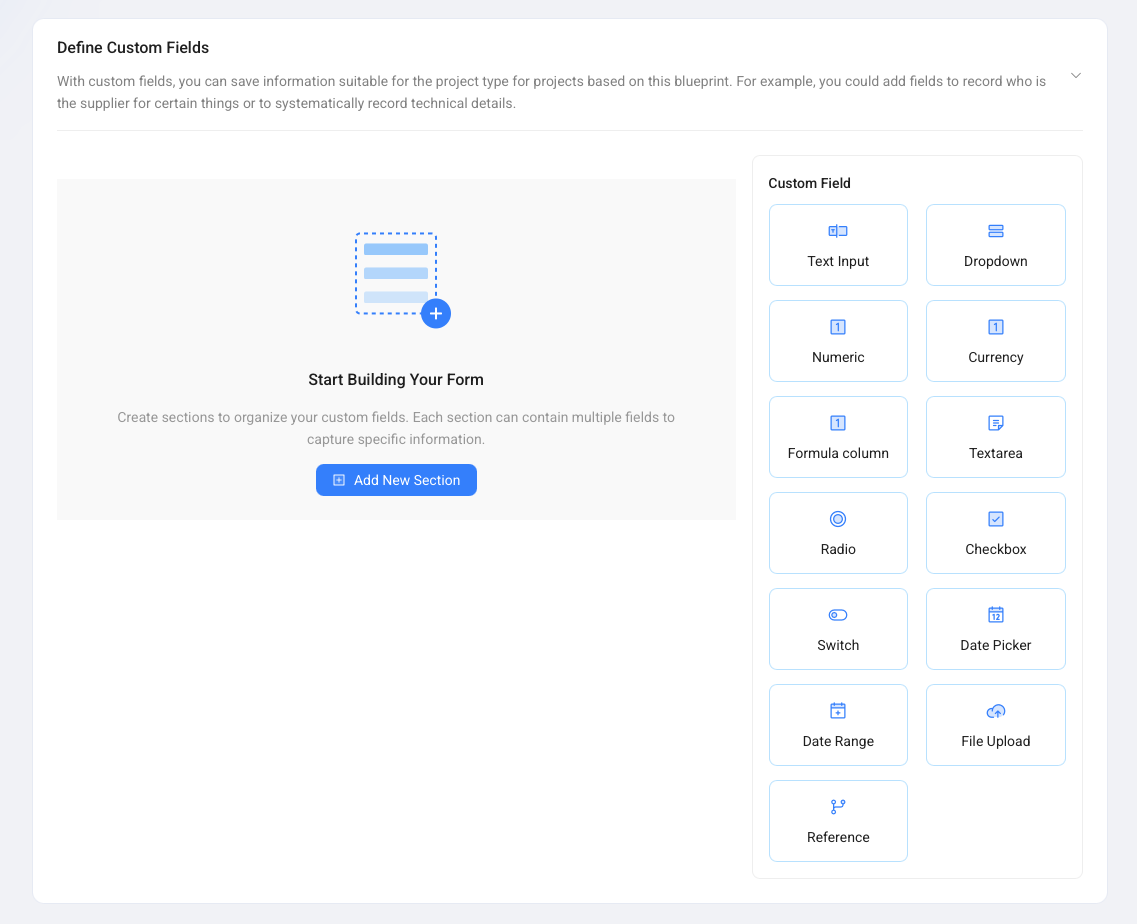
Click Add New Section to create a group for your fields. Then choose a field type, such as Text Input, Dropdown, Numeric, Currency, Date Picker, File Upload, or Reference.
Custom fields appear when users submit or edit trip requests. Keep them focused on information your team actually reviews. A short form is easier for travelers to complete correctly.
Understand User Approval Overrides
User approval overrides let administrators change trip approval behavior for one specific user. These settings live on the user profile, not in Trips Settings.
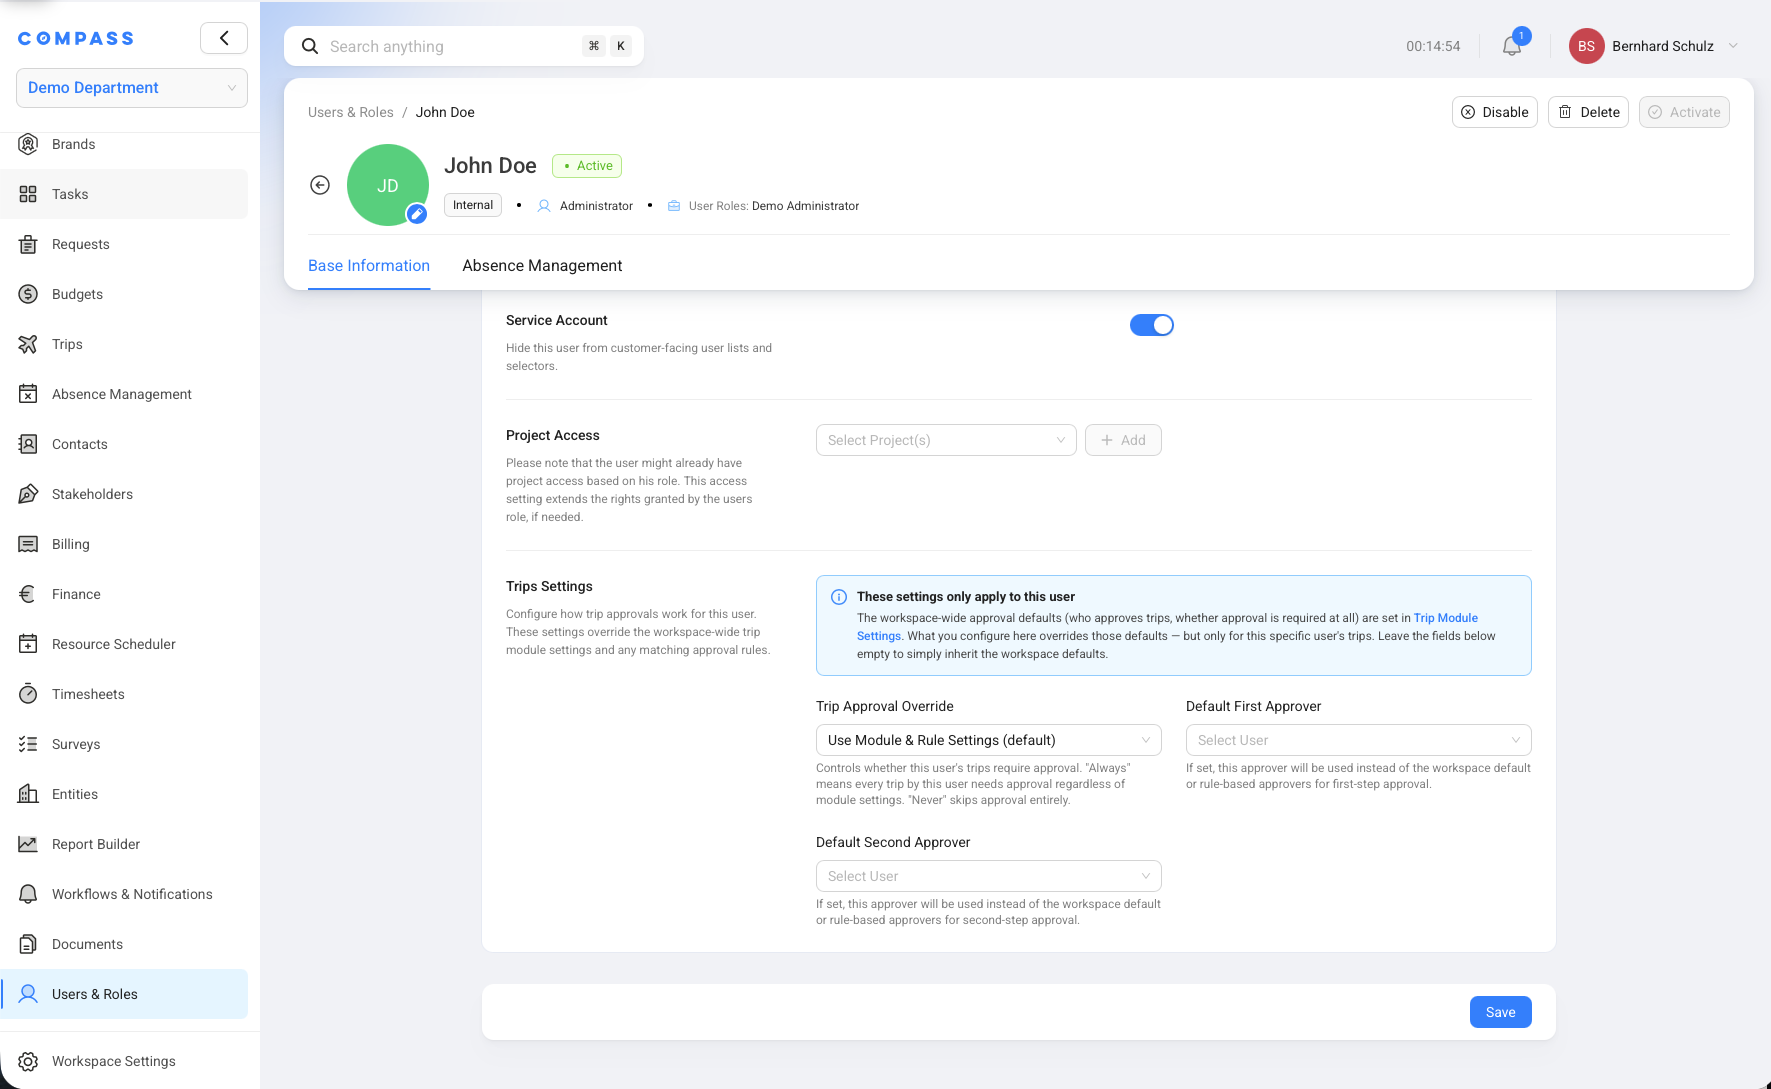
Open Users & Roles -> Users, select the user, and stay on Base Information. In Trips Settings, use Trip Approval Override to choose one of three options:
| Option | What it means |
|---|---|
| Use Module & Rule Settings | Compass follows the Trips module defaults and any matching approval rules. This is the normal choice. |
| Always require approval | This user's trips always need approval, even if the module or rule settings would skip it. |
| Never require approval | This user's trips never need approval, even if the module or rule settings would require it. |
You can also set a Default First Approver or Default Second Approver for that user. Use this when a traveler has a specific manager or approver who should replace the workspace default.
User-level trip approval settings win over the module and rule settings. Use them carefully, because they apply to every trip for that user.
Control Who Can Use Trips Features
Trip permissions are managed in Users & Roles -> Roles. Open a role, go to Module Permissions, and select Trips from the module list.
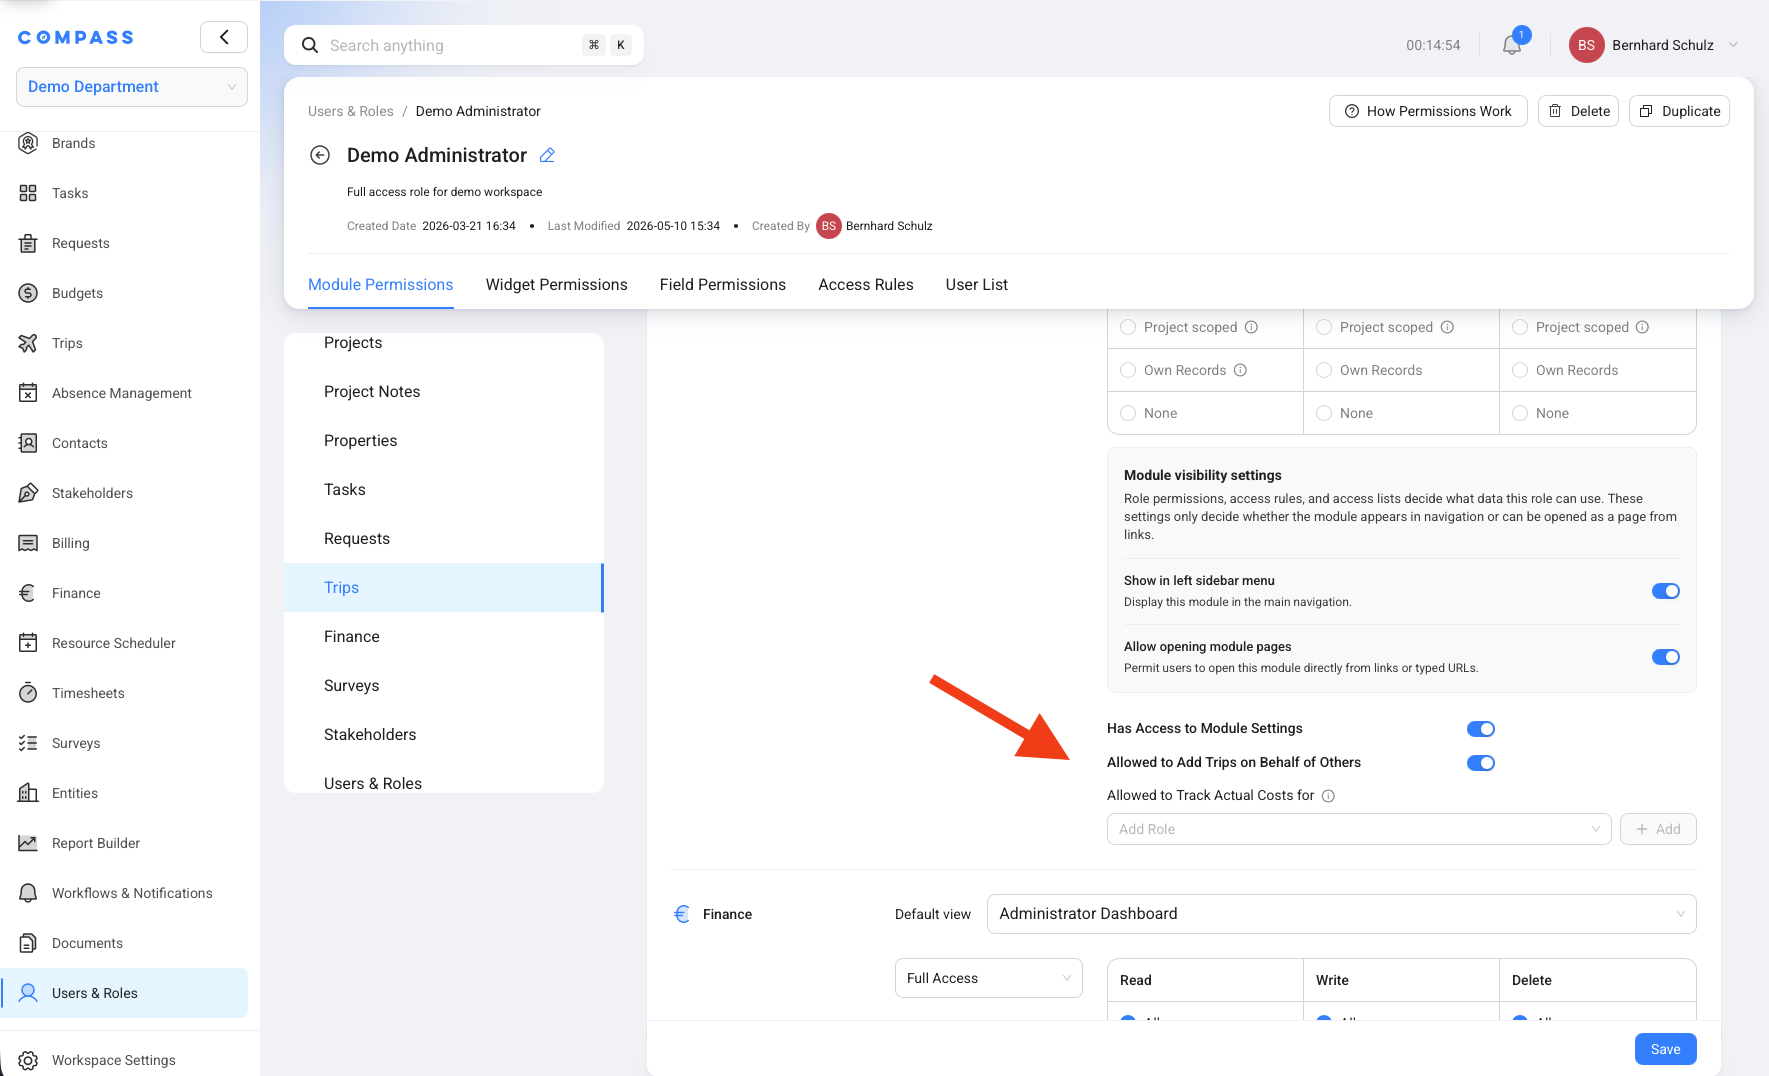
Use Has Access to Module Settings for administrators who should change Trips Settings. Use Allowed to Add Trips on Behalf of Others for assistants, coordinators, or managers who submit travel requests for other travelers.
Use Allowed to Track Actual Costs for when a role should enter actual costs for other users after a trip is completed. This is useful when finance, an operations coordinator, or a travel administrator collects the final receipts.
Control Who Can Manage Trip Option Lists
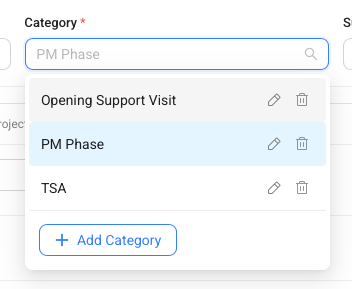
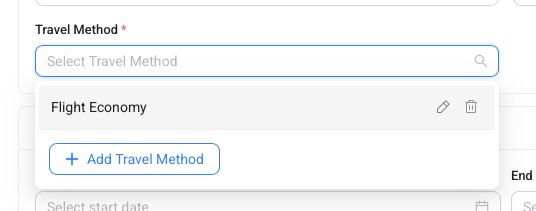
Trip option lists include values such as Category, Subcategory, and Travel Method. These lists are visible in the trip creation form, but not every user should manage the options.
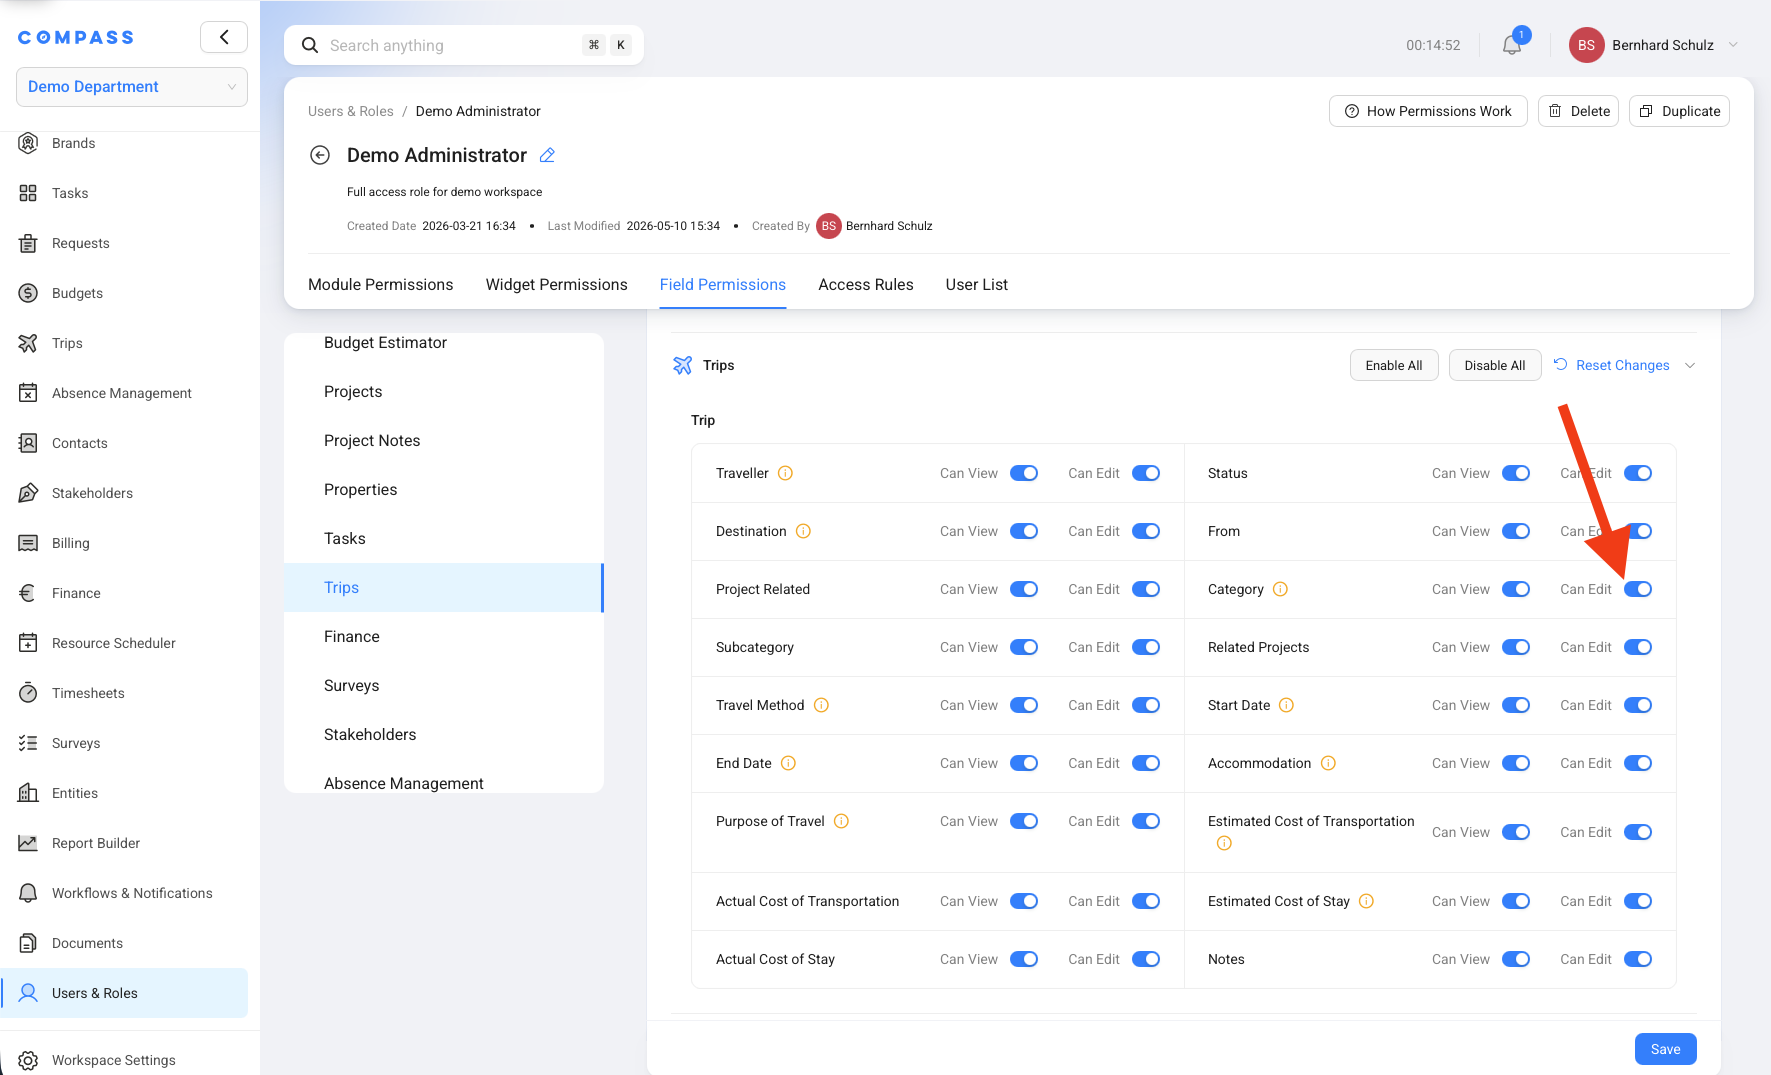
Use Users & Roles -> Roles -> Field Permissions -> Trips to control who can edit or manage these fields.
For example, normal end users can select a category such as Opening Support Visit, while only administrators can add, rename, or delete category options.
The same idea applies to travel methods. A traveler may select Flight Economy, while only an allowed role can add a new travel method to the list.
Connect Trips To Project Budget Rules
Project Blueprints decide whether trip costs can or must be assigned to a Budget Item for that project type. Open the Project Blueprint and go to the Billing tab to review Travel Time / Service Fees and Travel Expenses.
Choose No cost allocation, Optional cost allocation, or Required cost allocation separately for each source. Required allocation makes the Budget and Budget Item mandatory. Optional allocation lets the user choose whether the activity should contribute to a Budget Item actual.
Allocation writes the final cost to the internal Actual Cost Ledger. A separate Service Revenue Budget settlement decides whether that cost can also create an Invoice Position.