Build the Form
A template is set up in three steps: Form, Sending and After submission. This page covers the first step: the questions the recipient answers.
You need the Manage templates permission (Users & Roles → your role → Service Forms). Without it, you can send forms but not build them.
Create a Template
Open the Templates tab
Go to Service Forms → Templates and click New template.
Name it and pick the project type
Give the template a clear name, for example Property contacts. Choose the project type: the form can only be sent to projects of this type, and only their fields can receive the answers.
Add your blocks
You land on the Form step. Add questions and content as described below. Next takes you to Sending and After submission; Publish on the last step makes the template ready to send.
Add Blocks to the Form
The form in the middle looks exactly like the page the recipient will see. On the right is the Add to form panel with all blocks.
- Click a block to add it at the end of the form, or after the block you are editing.
- Drag a block into the form. A dashed box shows where it will land.
- Use + Add block at the end of each page.
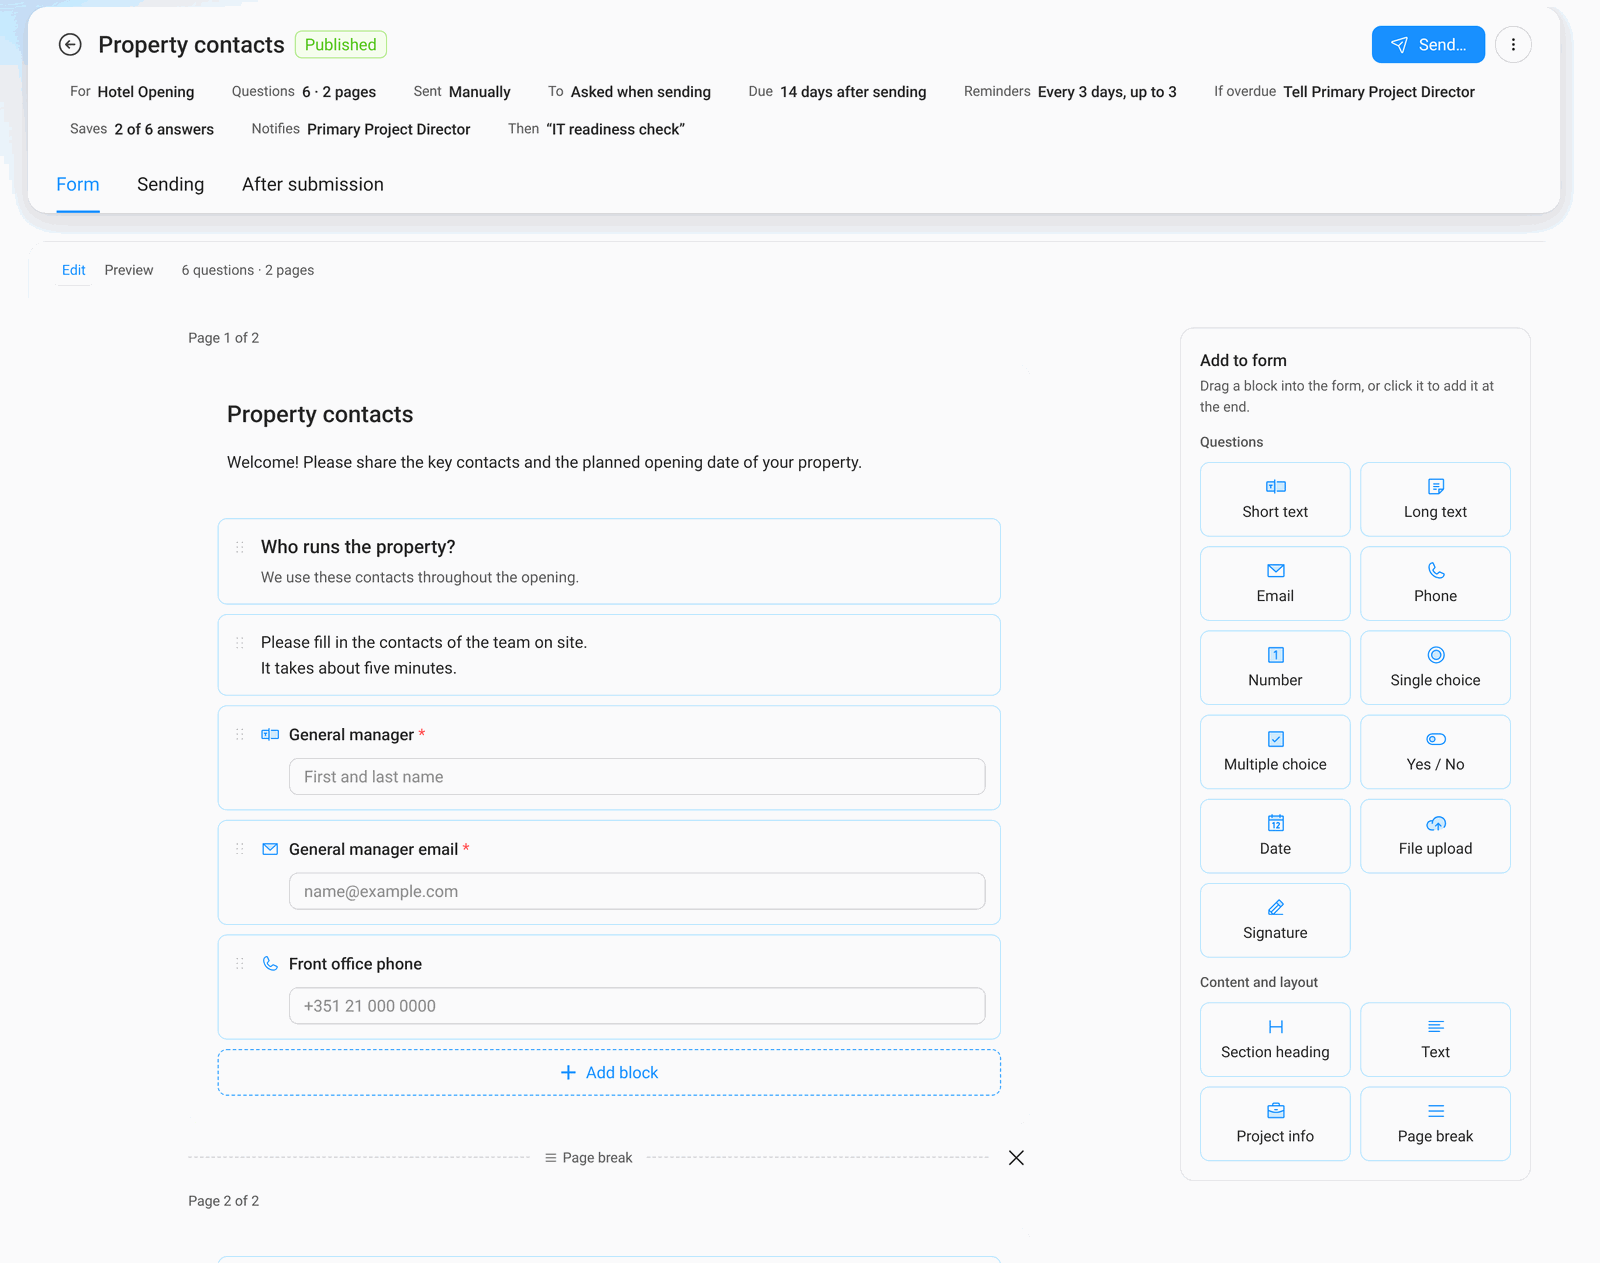
Which Blocks Are There?
The blocks come in two groups.
| Block | What the recipient gets |
|---|---|
| Short text, Long text | A text box (one line or several) |
| Email, Phone, Number, Date | A field that checks the format |
| Single choice, Multiple choice | A list of options to pick from |
| Yes / No | Two buttons |
| File upload | A drop area for files, for example a signed agreement |
| Signature | A box to sign with the mouse or a finger |
| Section heading | A heading, with an optional line below it |
| Text | A paragraph of explanation, no answer needed |
| Project info | A value from the project, shown read-only (for example the project name) |
| Page break | Starts a new page; the recipient clicks Continue |
A page that only has a heading and some text is fine. It shows as its own step, for example a welcome page or a closing note.
Edit a Block
Click a block to edit it right where it is. Type the question, then use the bar at the bottom:

- Type — change, for example, Short text into Long text.
- Required — the recipient cannot send the form without an answer.
- Add help text — a short hint under the question.
- Placeholder — the grey example text inside the field (here: First and last name).
- Set limits — for numbers (lowest, highest, decimals) and files (how many, how big, which types).
- Duplicate and Delete on the right.
Headings and texts are edited the same way, but without a type or settings bar:

To reorder, grab the dotted handle (⋮⋮) on the left of a block and move it.
Check the Form With Preview
Switch from Edit to Preview at the top of the form. You see the form as the recipient will, on a desktop or phone width. Preview never sends anything.